Setting up SCIM provisioning on Azure AD
Synchronize your user identities.Before you begin
You have configured your application in the Azure portal.
Procedure
-
Go to https://login.microsoftonline.com to find the application created in Azure Active Directory and click it to open its page.
-
In the Manage section, click Provisioning to open its view.
-
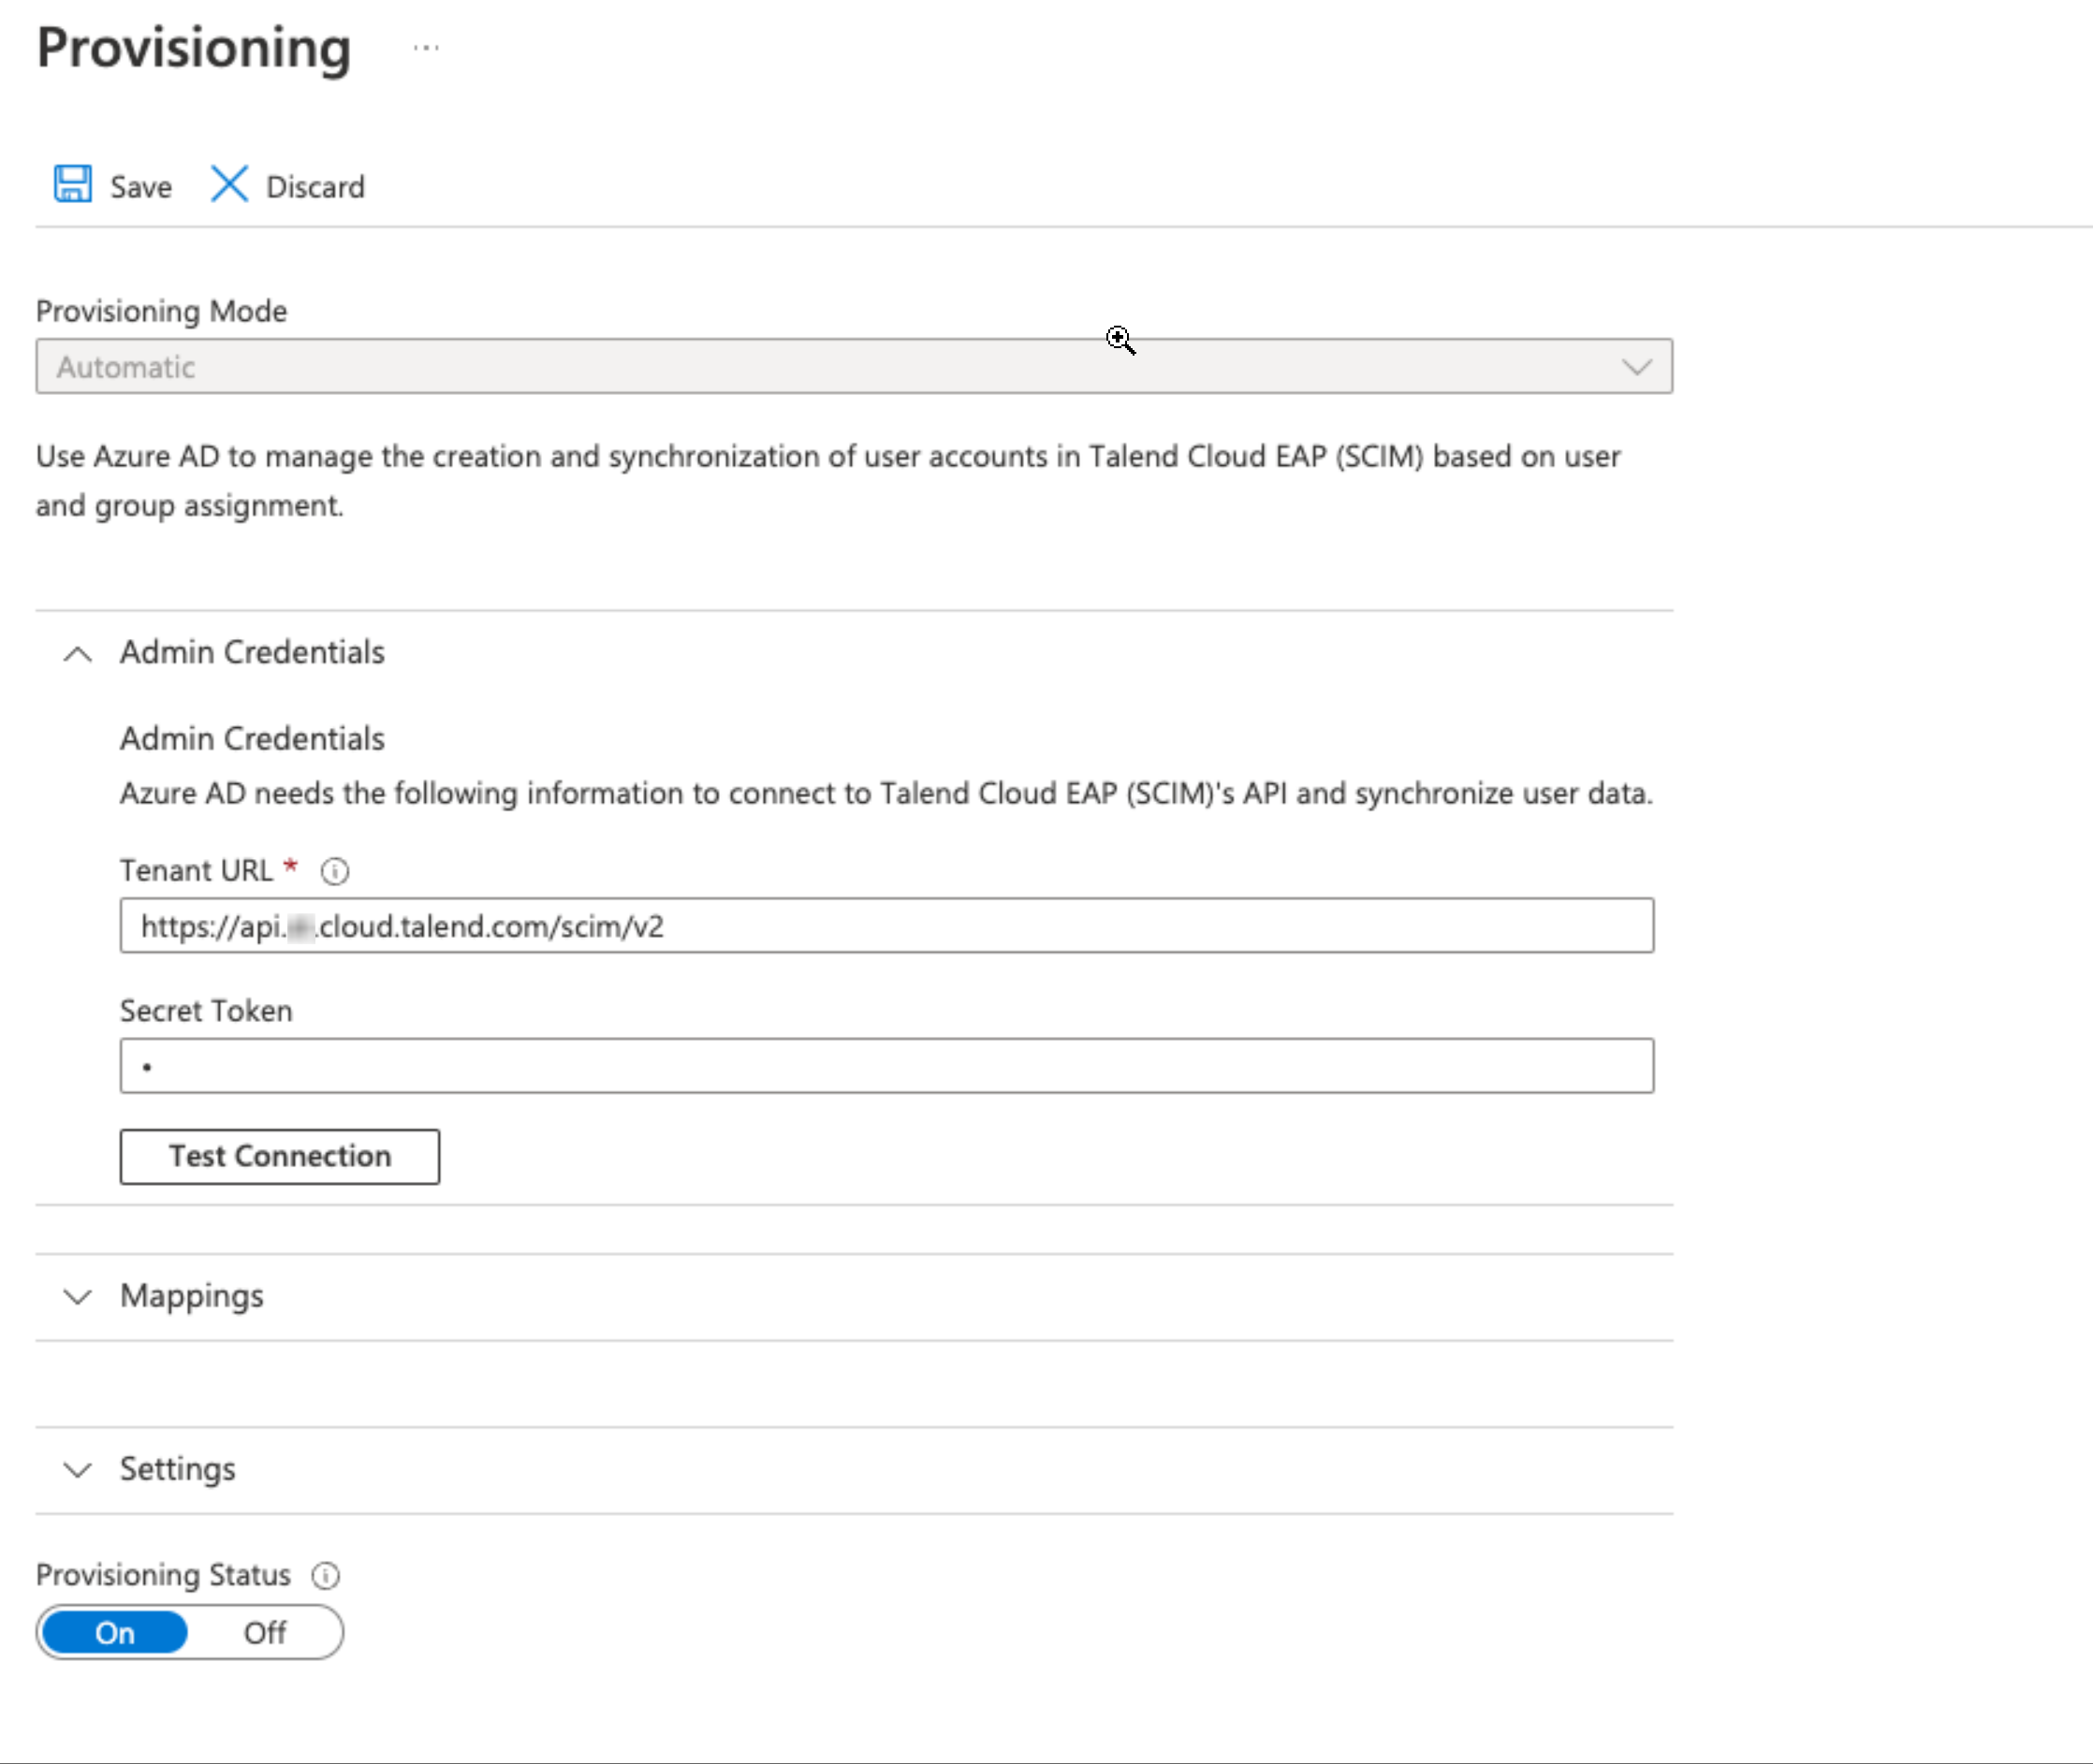
Ensure that the Provisioning Mode is Automatic and expand Admin Credentials.
-
In the Tenant URL field, enter the address of the SCIM specific API provided by Talend Cloud:
https://api.<env>.cloud.talend.com/scim/v2Replace
<env>with the name of your Cloud region. For further information, see Talend Cloud regions and URLs.For further information about the Talend SCIM API, see https://api.talend.com/apis/scim-v2/2021-03/.
-
In the Secret Token field, enter your personal access token or service account token to Talend Cloud.
-
Click Test Connection. A message should appear to indicate that your connection to the SCIM API of Talend Cloud is successful.
-
Expand the Mappings section, click Provision Azure Active Directory Users to open its Attribute Mappings page and change the Azure Active Directory Attribute for the
userNameattribute tomailNickname, because the mail nickname is the format required by theuserNameattribute of Talend Cloud.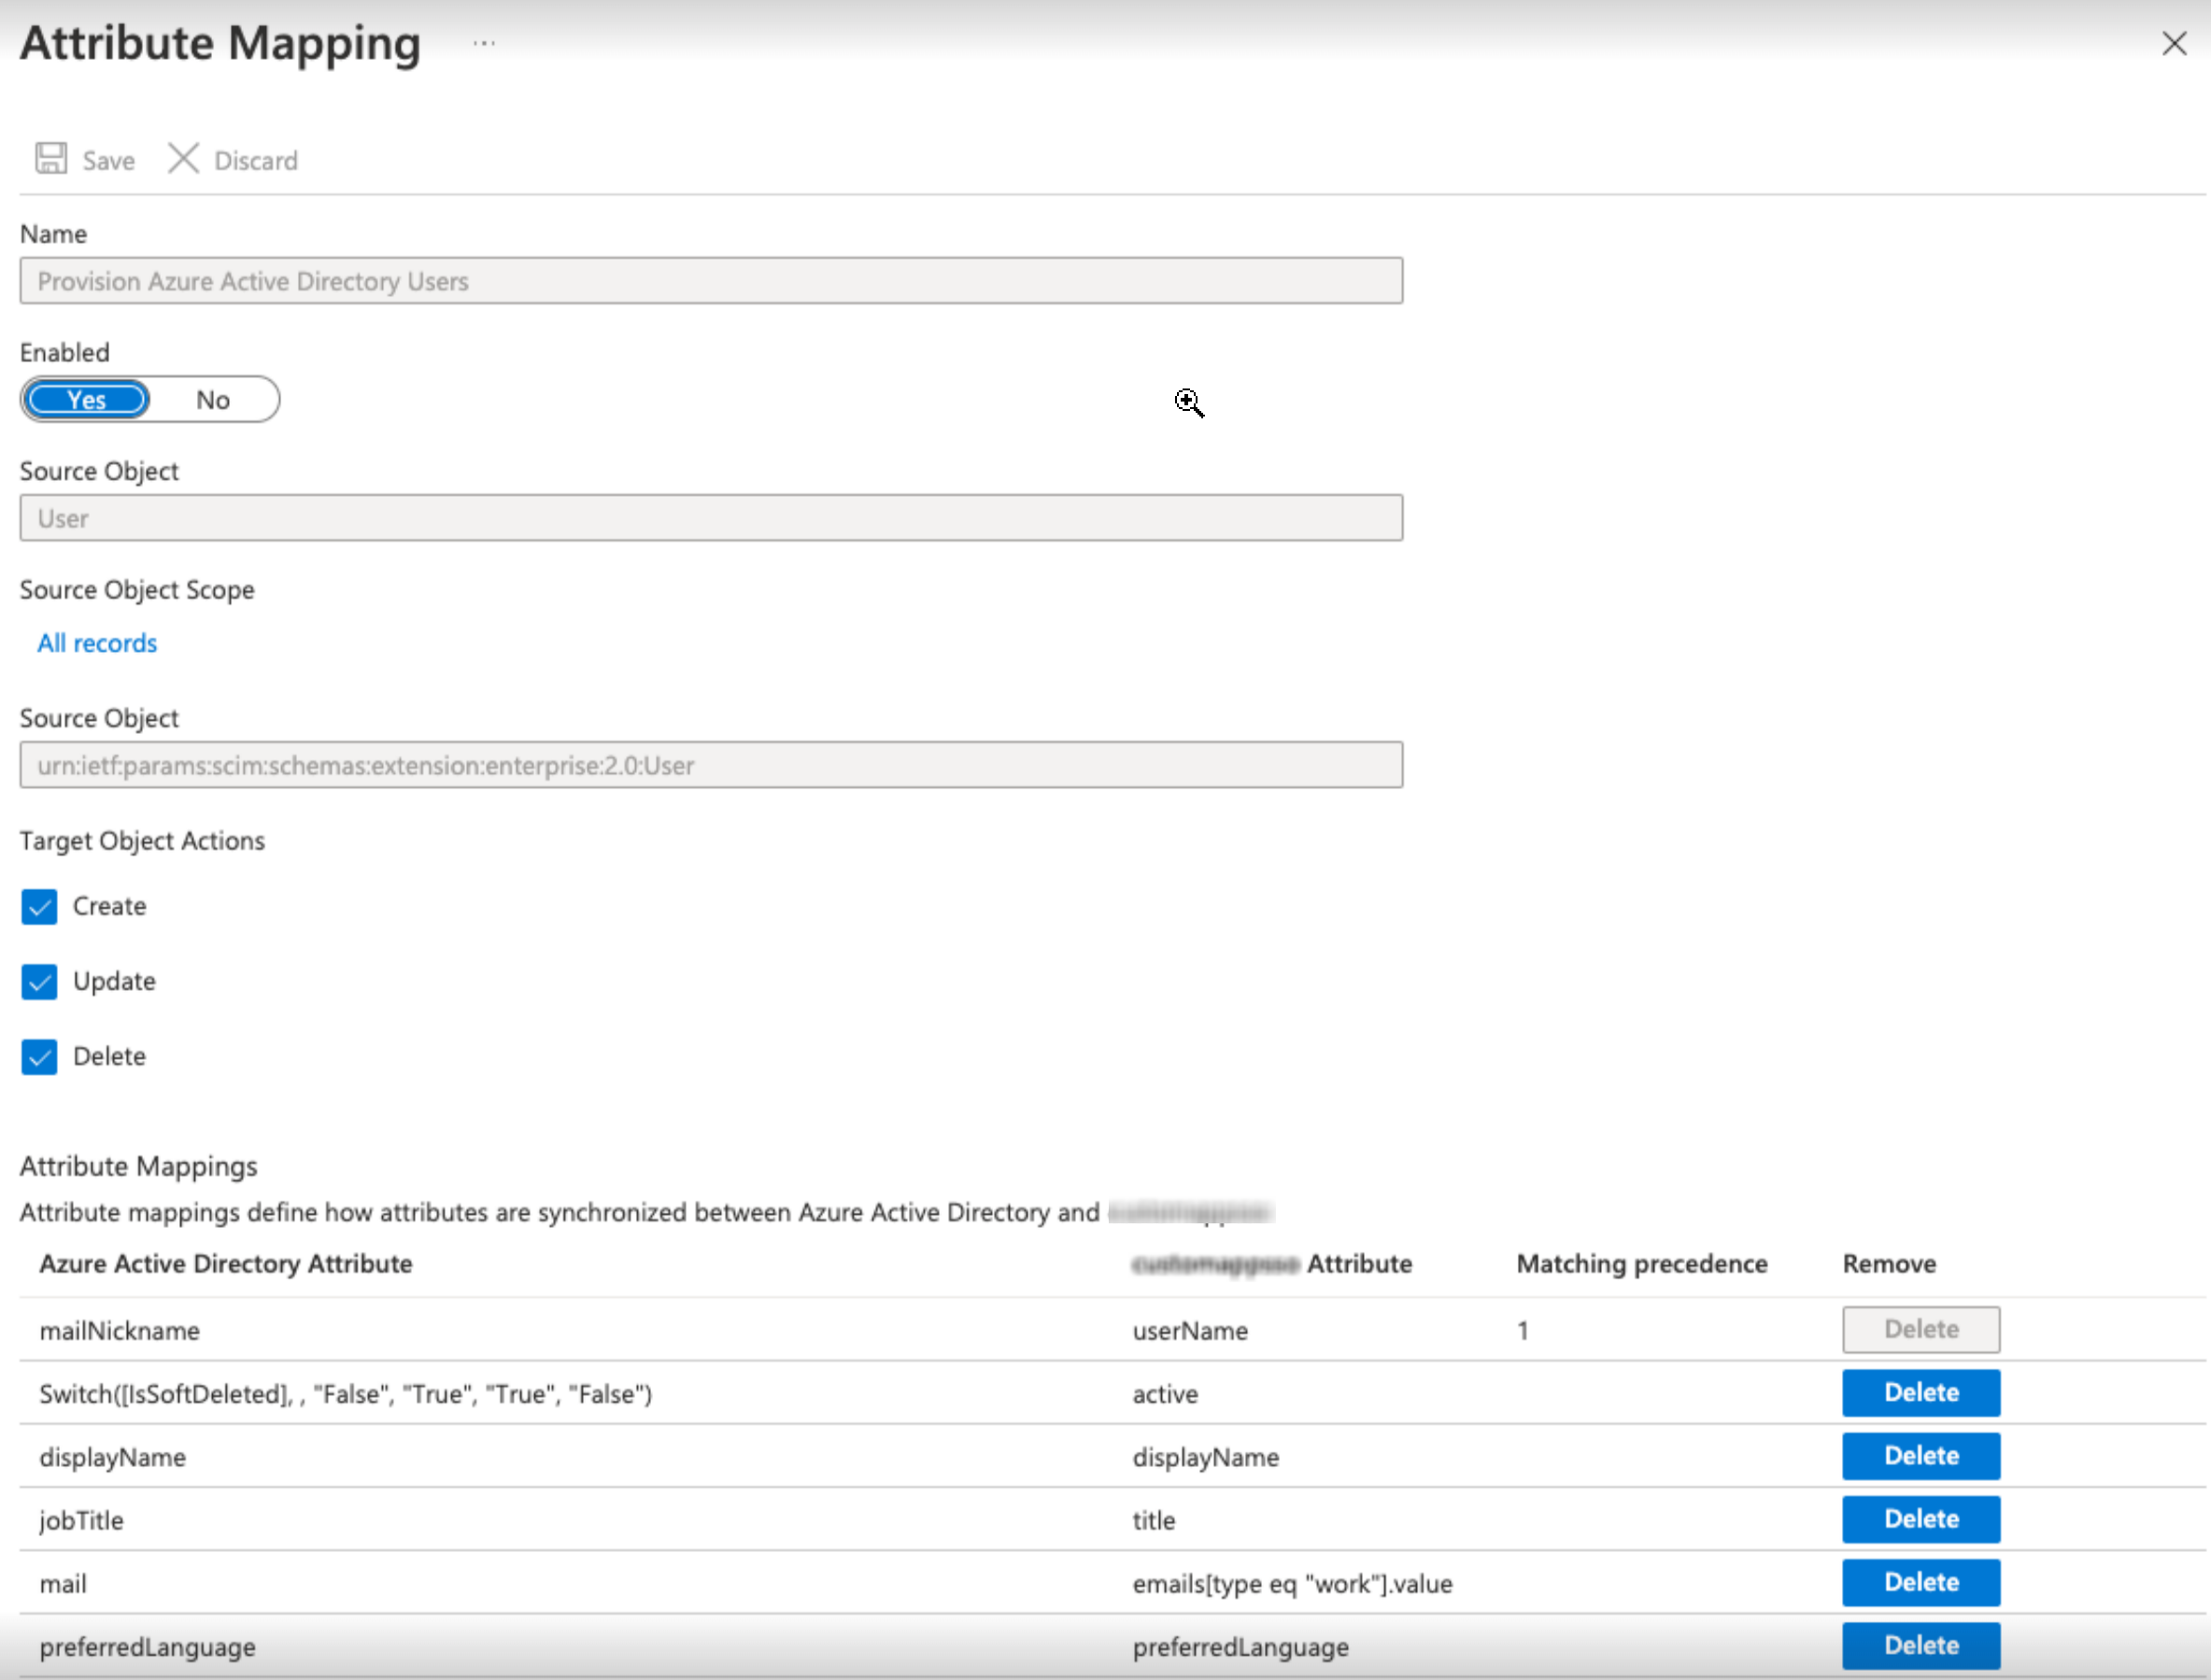
Results
Users and groups to be created in your Azure system are now synchronized to Talend Cloud Management Console.
What to do next
If you have enabled SSO for Talend Cloud Management Console in your third-party system, the Azure system in this example, it is recommended to map roles between your third-party system and Talend Cloud Management Console to automate the role assignment for the synchronized users and groups.