Creating a user
Call the account/users/ endpoint to create users.Before you begin
- Make sure the account that will be used to issue API calls has the Users - Management permissions.
- The user or service account to be used to issue the API request must have the
TMC_SSO_MANAGEMENTpermission.
- Generate an access token:
- For users, generate a personal access token. For further information, see Generating a Personal Access Token.
- For service accounts, generate a service account token. For further information about how to generate a service account token, see Generating a service account token. Once generated, a service account token expires after 30 minutes. If it expires, generate a new token using the POST method at the endpoint
https://api.{env}.cloud.talend.com/security/oauth/token.
- Ensure that the user or the service account to be used to issue API calls has the
TMC_OPERATORrole and theREADpermission for the workspace to which the task to be verified belongs.
Procedure
-
Open Talend API Tester in your browser and select GET from the Method list.
-
In the field next to the Method drop-down list, enter the user management endpoint to be used:
https://api.<your_environment>.cloud.talend.com/account/roles/
Your environment could be:- eu
- us
- us-west
- ap
- au
-
In the HEADERS area, click Add header and in the name field that is displayed, enter
Authorizationand in the value field, enterBearerand your personal access token. Enter a whitespace to separateBearerand your personal access token. -
Click Send to issue your call to obtain the role ID(s) to be assigned to the user to be created. The response lists the IDs of the roles already defined for your Talend Cloud applications. Note down the ID to be assigned to the user to be created.
-
Select POST from the Method list and in the field aside, enter the user management endpoint to be used:
https://api.<your_environment>.cloud.talend.com/account/users/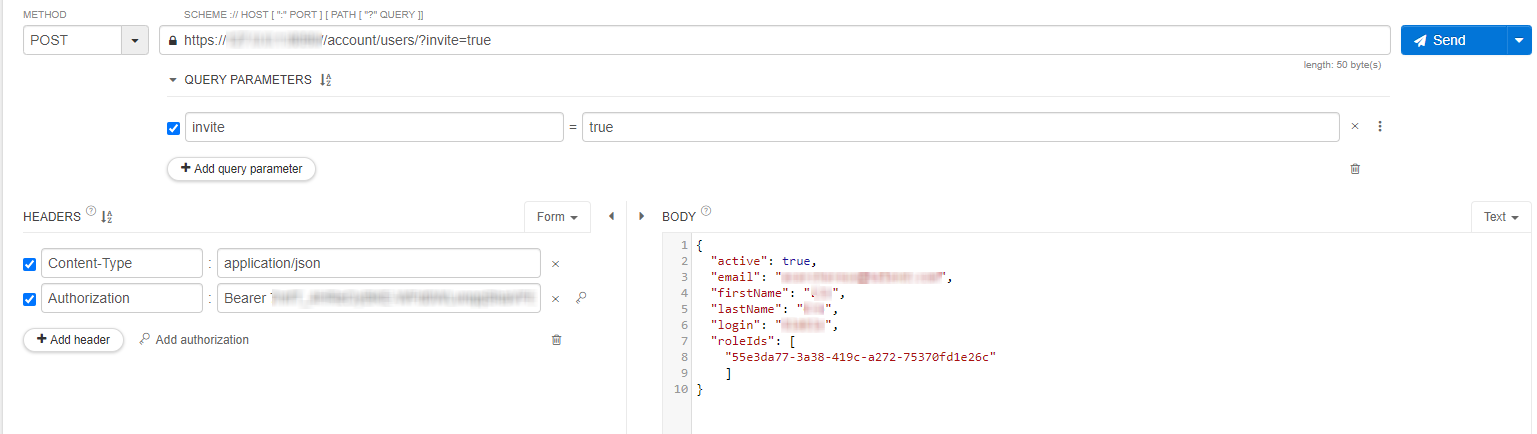
-
Click Add query parameter and in the name and the value fields that are displayed, enter
inviteparameter andtrue, respectively. This row now reads likeinvite = true. -
Click Add header. In the name field that is displayed, enter
Content-Typeand in the value field, enterapplication/json. -
Click Add header again and in the name field that is displayed, enter
Authorizationand in the value field, enterBearerand your personal access token or the service account access token. Enter a whitespace to separateBearerand the token. -
In the BODY area, enter the profile of the user to be created.
Example
 {
		"active": "true",
		"email": "user_email_to_receive_invitation",
		"firstName": "string",
		"lastname": "string",
		"login": "string",
		"roleIds": [
			"role_id_retrieved_in_previous_steps"
	    ]
 }
In this example, only the required fields are used for the user creation.
If needs be, you can add more fields:
"password": "string",
"phone": "string",
"preferredLanguage": "EN",
"timezone": "string",
"title": "string",
Note that a valid password must contain more than 7 characters with:
- numbers
- upper-case letters
- special characters
- none of the information from the email, the firstName, the lastName or the login fields.
- Click Send to issue your call.
Results
The creation is accomplished successfully and the status code 201 is returned. In the BODY field of the response, the details of this created user are displayed.